
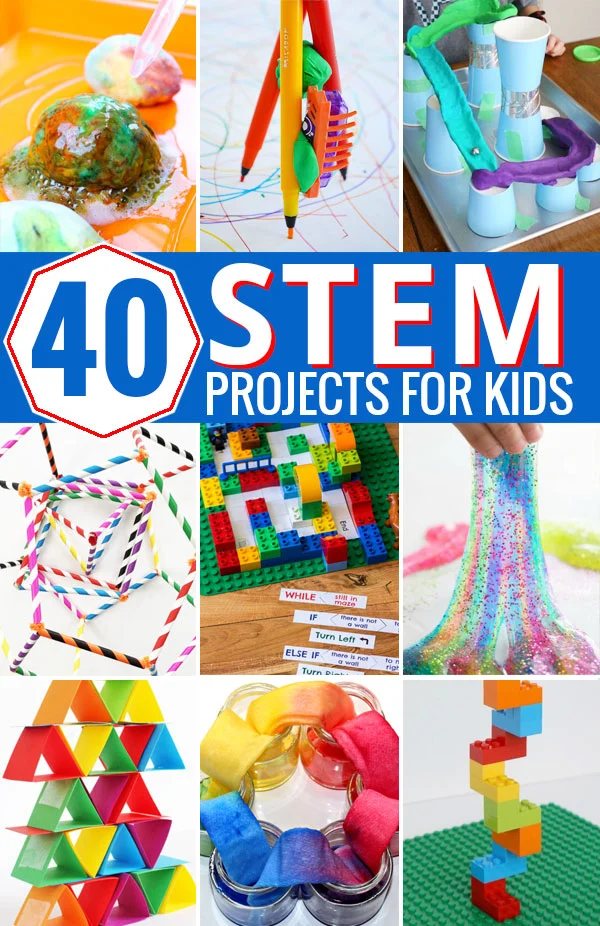
Children are naturally curious about the world around them. They want to know why objects float, how bridges stay upright, what makes plants grow, and how simple machines work. Hands-on science, technology, engineering, and mathematics (STEM) activities turn these questions into opportunities for discovery.
Hands-on STEM projects for elementary students encourage children to explore ideas, build models, test predictions, solve problems, and learn from mistakes. Instead of simply memorizing scientific facts or mathematical formulas, students apply their knowledge to practical challenges that make learning more engaging and meaningful.
Teachers can introduce STEM projects through everyday materials, simple experiments, creative construction tasks, and collaborative investigations. These activities can support critical thinking, creativity, communication, measurement, and early engineering skills without requiring expensive equipment or specialized laboratories.
This guide presents practical STEM projects for elementary school students, explains how to organize them safely, and offers strategies for adapting activities to different grade levels and learning needs.
What Are Hands-On STEM Projects?
Hands-on STEM projects are learning activities in which students investigate a question, design a solution, construct a model, conduct an experiment, or use evidence to solve a problem.
STEM combines four related areas of learning:
- Science: Observing the natural world, asking questions, testing predictions, and explaining results.
- Technology: Using tools, devices, or digital resources to accomplish a task.
- Engineering: Designing, building, testing, and improving solutions to practical problems.
- Mathematics: Measuring, counting, comparing quantities, identifying patterns, and analyzing results.
A single project can combine several of these areas. For example, when students build a paper bridge, they use engineering to design the structure, mathematics to measure its length, and science to investigate how shape and material affect strength.
The purpose is not to turn every activity into a complicated technical lesson. It is to help children connect ideas, ask questions, and discover how learning can be used in real situations.
Why Are STEM Projects Important for Elementary Students?
Elementary school is an important time for developing curiosity, confidence, and foundational academic skills. Well-designed STEM projects allow students to practise these abilities through active participation.
1. Encourages curiosity and exploration
Children learn by asking questions and investigating what happens when they change something. A project involving shadows, magnets, plants, or floating objects gives students a reason to observe closely and explain what they notice.
Teachers can encourage this curiosity by asking open-ended questions rather than immediately giving students the answers.
2. Develops critical thinking and problem-solving
STEM challenges require students to identify a problem, consider possible solutions, test their ideas, and use evidence to decide what to do next.
For example, if a paper tower collapses, students can examine its base, shape, and materials before trying a different design. They learn that an unsuccessful attempt can provide useful information.
3. Connects classroom concepts to real life
Students may find mathematics or science easier to understand when they see how the concepts work in practical situations.
Measuring the height of a tower reinforces measurement skills. Comparing how quickly different materials absorb water introduces observation and data recording. Designing a simple ramp creates opportunities to discuss movement, height, and distance.
4. Supports creativity and innovation
Many engineering challenges allow more than one successful solution. Students can experiment with different materials, shapes, and construction methods while working toward the same goal.
This encourages flexible thinking and helps students understand that creative ideas can be tested and improved.
5. Builds collaboration and communication
Group projects give students opportunities to explain their ideas, listen to classmates, divide responsibilities, and reach decisions together.
Teachers can strengthen these skills by assigning rotating roles, such as designer, materials manager, recorder, and presenter.
6. Helps students develop confidence
When students see an idea become a working model or observe a result they predicted, they gain experience applying their knowledge independently.
Teachers should recognize effort, thoughtful questions, careful observations, and improvements—not only successful final products.
15 Hands-On STEM Projects for Elementary Students
The following projects use accessible materials and can be adapted for different elementary grade levels. Teachers should select activities based on students’ abilities, available resources, learning objectives, and classroom safety requirements.
1. Build a Paper Bridge
STEM areas: Engineering, mathematics, and science
Best for: Grades 2–5
Time required: 30–45 minutes
Materials:
- Sheets of paper
- Tape
- Two books or blocks
- Small counters or other lightweight objects for testing
Objective: Design a bridge that spans a gap and supports as much weight as possible.
Instructions:
- Place two books a short distance apart to create a gap.
- Ask students to design a bridge using paper and a limited amount of tape.
- Let each group sketch its design before building.
- Place the bridge across the gap.
- Add small weights one at a time and record how much the bridge supports.
- Give students time to revise their designs and test them again.
Learning outcomes:
Students explore how shape, folding, and structural support affect strength. They also practise measurement, fair testing, recording results, and explaining why one design performed differently from another.
Extension challenge: Ask students to create a bridge using less paper while supporting the same weight.
2. Create a Paper Airplane Investigation
STEM areas: Science, engineering, and mathematics
Best for: Grades 1–5
Time required: 30–40 minutes
Materials:
- Paper
- Measuring tape
- Open indoor space
- Recording sheets
Objective: Investigate how different paper airplane designs affect flight distance.
Instructions:
- Ask students to predict which airplane design will travel farthest.
- Have them build two or three designs using the same type and size of paper.
- Mark a safe launch area.
- Fly each airplane under similar conditions.
- Measure and record the distance traveled.
- Compare the results and discuss possible reasons for differences.
Learning outcomes:
Students practise prediction, measurement, comparison, and experimental design. They learn that a fair test requires consistent conditions, including the launch area and method of throwing.
Extension challenge: Ask students to repeat each flight several times and calculate the average distance.
3. Design a Water Filter Model
STEM areas: Science, engineering, and environmental education
Best for: Grades 3–5
Time required: 40–60 minutes
Materials:
- Clear plastic cups or teacher-prepared containers
- Clean gravel
- Sand
- Cotton or filter paper
- A container of muddy water made with clean soil and tap water
- Collection containers
Objective: Investigate how different materials affect the appearance of water passing through a filter.
Instructions:
- Discuss why water may contain visible particles.
- Ask students to predict which materials might remove some of those particles.
- Have the teacher prepare the filtering containers safely.
- Students arrange the materials in different layers.
- Slowly pour the muddy water through each model.
- Observe and compare the collected water.
- Record which materials appeared to remove the most visible particles.
Learning outcomes:
Students explore filtration, material properties, observation, and engineering design.
Safety note: Filtered water from this activity is not drinking water. Even if it looks clear, it may contain harmful microorganisms or dissolved contaminants. Never taste it or use it for consumption.
Extension challenge: Ask students to compare two filter designs and explain how they would improve the model.
4. Build a Balloon-Powered Car
STEM areas: Engineering, science, and mathematics
Best for: Grades 3–5
Time required: 45–60 minutes
Materials:
- Lightweight cardboard
- Drinking straws
- Bottle caps or suitable lightweight wheels
- Wooden skewers prepared by an adult
- Balloons
- Tape
- Scissors used under appropriate supervision
Objective: Build a small vehicle that moves using air released from a balloon.
Instructions:
- Create a lightweight car body from cardboard.
- Attach straw sections underneath to hold the axles.
- Fit the wheels onto the axles.
- Secure a balloon to a straw so air can escape backward.
- Attach the balloon-and-straw assembly to the car.
- Inflate the balloon, release the car, and observe its movement.
- Test different designs and compare the distances traveled.
Learning outcomes:
Students explore how escaping air can produce motion, while practising construction, measurement, and iterative design.
Extension challenge: Compare how changes in the vehicle’s weight, wheel alignment, or balloon size affect movement. Change one variable at a time for a clearer comparison.
5. Grow a Seed and Track Its Progress
STEM areas: Science, mathematics, and environmental education
Best for: Grades 1–5
Time required: Several days to several weeks
Materials:
- Seeds such as beans
- Clear cups or small pots
- Soil or suitable growing medium
- Water
- Ruler
- Observation journal
Objective: Observe how a seed develops and identify conditions that support plant growth.
Instructions:
- Ask students what they think a seed needs to grow.
- Plant seeds in suitable containers.
- Give the plants appropriate light and water.
- Ask students to observe changes regularly.
- Measure plant height at consistent intervals.
- Record observations using words, drawings, or tables.
- Compare growth patterns and discuss what students learned.
For a controlled investigation, students can compare one variable, such as light exposure, while keeping other conditions as similar as practical. Use several plants when possible, since individual seeds can grow at different rates.
Learning outcomes:
Students practise observation, measurement, record-keeping, and understanding how living things respond to environmental conditions.
Extension challenge: Create a line graph showing plant height over time.
6. Make a Simple Circuit
STEM areas: Science, technology, and engineering
Best for: Grades 3–5
Time required: 30–45 minutes
Materials:
- A low-voltage educational circuit kit
- Small battery holder
- Miniature bulb or suitable low-voltage LED
- Compatible wires
- Teacher-approved connectors
Objective: Explore how a complete electrical circuit allows a light to turn on.
Instructions:
- Show students the battery, wires, and light component.
- Ask them to predict what is needed to make the light work.
- Using an approved kit, help students connect the components.
- Observe whether the light turns on.
- If it does not, guide students to check the connections.
- Ask students to draw the completed circuit and explain how its parts work together.
Learning outcomes:
Students learn that a simple circuit needs a complete conducting path and practise systematic troubleshooting.
Safety note: Use only low-voltage educational equipment. Never connect classroom experiments to wall outlets or mains electricity. Do not use damaged batteries, and follow the equipment manufacturer’s instructions.
7. Construct a Tall Paper Tower
STEM areas: Engineering, mathematics, and science
Best for: Grades 1–5
Time required: 30–40 minutes
Materials:
- Paper
- Tape
- Ruler
- Flat building surface
Objective: Build the tallest freestanding tower possible using a limited amount of paper and tape.
Instructions:
- Explain the height requirement and material limits.
- Ask students to sketch a possible tower.
- Let them roll, fold, or layer paper to create structural supports.
- Build the towers and measure their height.
- Observe whether each structure stands without assistance.
- Discuss which shapes and supports improved stability.
- Allow students to redesign their towers.
Learning outcomes:
Students practise spatial reasoning, measurement, structural design, and iterative improvement.
Extension challenge: Add a stability requirement, such as remaining upright when a gentle breeze from a hand fan reaches the tower.
8. Investigate Floating and Sinking
STEM areas: Science and mathematics
Best for: Grades 1–4
Time required: 30–40 minutes
Materials:
- A wide container of water
- A tray of safe objects made from different materials
- Towels
- Prediction and observation sheets
Objective: Investigate which objects float and which sink, then compare predictions with results.
Instructions:
- Show students a selection of safe objects.
- Ask them to predict whether each object will float or sink.
- Record predictions before testing.
- Place each object gently in the water.
- Record the results.
- Group the objects according to their observed behaviour.
- Discuss patterns and possible explanations.
Learning outcomes:
Students practise classification, prediction, observation, and evidence-based reasoning.
Extension challenge: Give students a small piece of modelling clay and ask them to investigate how changing its shape affects whether it can float.
9. Design a Marble Run
STEM areas: Engineering, physics, and mathematics
Best for: Grades 2–5
Time required: 40–60 minutes
Materials:
- Cardboard strips or paper tubes
- Tape
- Blocks or books
- A large marble or suitable rolling object
- A collection tray
Objective: Design a track that guides a rolling object from a starting point to a target.
Instructions:
- Set a starting point and target area.
- Ask students to sketch a track with turns, slopes, or supports.
- Build the track using the available materials.
- Release the marble and observe its movement.
- Identify where it stops, leaves the track, or moves too quickly.
- Adjust the slope, supports, or track shape.
- Test the improved design.
Learning outcomes:
Students explore motion, gravity, height, and design constraints while practising planning and testing.
Safety note: Use an appropriately sized object and supervise closely so small parts do not pose a choking risk for younger children.
10. Create a Weather Observation Station
STEM areas: Science, mathematics, and technology
Best for: Grades 2–5
Time required: 20–30 minutes per session over several days
Materials:
- Observation notebook
- Outdoor thermometer if available
- Simple teacher-approved rain gauge
- Weather symbols or chart paper
- Pencils and rulers
Objective: Observe weather conditions and use collected data to identify patterns.
Instructions:
- Choose a regular observation time.
- Ask students to record visible conditions, such as cloud cover and rainfall.
- Measure temperature if suitable equipment is available.
- Record the observations in a table.
- Compare the data over several days.
- Create a simple chart or graph.
- Discuss patterns and limitations in the observations.
Learning outcomes:
Students practise scientific observation, data collection, measurement, and interpretation.
Extension challenge: Ask students to create a simple weather summary using the evidence they collected.
11. Build a Protective Landing System
STEM areas: Engineering, science, and mathematics
Best for: Grades 3–5
Time required: 40–50 minutes
Materials:
- Paper
- Cardboard
- Cotton wool or other soft materials
- Tape
- A small, lightweight classroom object
- Measuring tape
Objective: Design a protective structure that reduces the impact when a lightweight object is lowered from a small height.
Instructions:
- Define the object to be protected and the test height.
- Give students a limited set of materials.
- Ask groups to sketch a protective design.
- Build the structure and place the object inside.
- Conduct a controlled test using a teacher-approved method.
- Inspect the object and the structure.
- Improve the design and repeat the test.
Learning outcomes:
Students investigate cushioning, structural support, and the relationship between design and impact.
Safety note: Do not drop objects from heights where they could injure someone or damage property. Use lightweight objects and a controlled test area.
12. Create a Mathematical Garden
STEM areas: Mathematics, science, and environmental learning
Best for: Grades 1–5
Time required: 30–45 minutes for the design, followed by optional planting
Materials:
- Graph paper
- Rulers
- Coloured pencils
- Plant pictures or seed packets
- Measuring tools if a real garden area is available
Objective: Design a small garden using mathematical measurement and basic planning.
Instructions:
- Give students a garden shape and a scale, or let them design a simple rectangular area.
- Ask them to draw the garden on graph paper.
- Divide the space into sections for different plants.
- Calculate dimensions, count grid squares, and compare the space used by each section.
- Explain how sunlight, water, and plant spacing may affect the design.
- Present and compare the plans.
Learning outcomes:
Students apply measurement, spatial reasoning, area concepts, planning, and basic plant science.
Extension challenge: Give students a fixed budget and ask them to choose plants or materials without exceeding it.
13. Create a Simple Sorting Machine
STEM areas: Engineering, mathematics, and computational thinking
Best for: Grades 2–5
Time required: 30–45 minutes
Materials:
- Paper or cardboard
- Reusable containers
- Safe classroom objects of different shapes or colours
- Labels
- Tape
Objective: Design a system that sorts objects according to a chosen rule.
Instructions:
- Select a group of safe objects.
- Decide on a sorting rule, such as colour, shape, size, or material.
- Sketch a system with different destinations for each category.
- Build a simple sorting station using labelled containers or cardboard channels.
- Test the system with the objects.
- Record any objects that are difficult to classify.
- Revise the rules or design.
Learning outcomes:
Students practise classification, pattern recognition, logical reasoning, and system design.
Extension challenge: Ask students to create a flowchart showing the sequence of decisions used to sort each object.
14. Explore Sunlight and Shadows
STEM areas: Science and mathematics
Best for: Grades 1–4
Time required: 20–30 minutes per session over a day or several days
Materials:
- Chalk or paper
- Ruler or measuring tape
- A safe outdoor location
- A stationary object, such as a classroom-approved marker or pole
Objective: Observe how the direction or length of a shadow changes with the position of the Sun.
Instructions:
- Place the object in a suitable outdoor location.
- Observe and mark the shadow at a particular time.
- Measure its length and record the direction.
- Repeat at a later time.
- Compare the measurements and discuss the changes.
- Draw a diagram showing the observations.
Learning outcomes:
Students practise measurement, repeated observation, recording data, and explaining patterns.
Safety note: Never ask students to look directly at the Sun. Conduct the investigation by observing shadows only.
15. Design a Recycling and Waste-Reduction System
STEM areas: Science, engineering, mathematics, and environmental education
Best for: Grades 3–5
Time required: 45–60 minutes
Materials:
- Clean sample packaging
- Labels
- Reusable containers
- Paper and pencils
- A simple recording sheet
Objective: Develop a practical system for sorting classroom waste or reducing unnecessary material use.
Instructions:
- Ask students to observe which kinds of waste commonly appear in the classroom.
- Record the types of materials found, without handling hazardous or contaminated waste.
- Discuss which items can be reused, recycled, or avoided.
- Design a labelled sorting system or propose a reuse station.
- Test whether students can sort sample items correctly.
- Revise the labels or layout based on the results.
Learning outcomes:
Students practise data collection, classification, environmental reasoning, and practical design.
Extension challenge: Compare classroom waste observations before and after introducing the new system.
How to Organize Successful STEM Projects in the Classroom
A successful project begins with a clear learning purpose. Teachers should plan the activity around a question or challenge that students can investigate, rather than simply asking them to make an object.
Set a clear objective
Decide what students should understand or practise. A paper bridge project might focus on comparing structural designs, while a seed-growing investigation might focus on recording plant growth.
Clear objectives help teachers decide what questions to ask and how to assess learning.
Use accessible materials
Many valuable STEM projects use paper, cardboard, tape, reusable containers, rulers, and classroom objects. Everyday materials allow students to focus on the problem-solving process instead of depending on expensive equipment.
Check materials beforehand to ensure they are clean, suitable for the students’ ages, and safe for the activity.
Encourage students to predict before testing
Ask students what they think will happen and why. Recording a prediction before an experiment helps students compare their initial thinking with the evidence they observe.
Students should understand that changing their prediction after seeing the evidence is part of learning.
Allow time for testing and improvement
Do not end every project after the first attempt. Give students time to examine what happened, identify possible improvements, and test a revised design.
The redesign stage is often where students gain the clearest understanding of the relationship between evidence and better solutions.
Encourage teamwork and individual thinking
Group work supports communication and collaboration, but every student should have an opportunity to contribute.
Teachers can combine group construction with individual sketches, predictions, measurement records, or reflection questions.
Ask questions that support deeper thinking
Useful teacher prompts include:
- What problem are you trying to solve?
- What do you already know?
- What do you predict will happen?
- How could you test your idea?
- Which variables should stay the same?
- What evidence supports your conclusion?
- What would you change next time?
These questions help students develop their reasoning without removing the challenge.
How to Adapt STEM Projects for Different Grade Levels
Not every project is suitable for every elementary student. Teachers should adjust the instructions, materials, number of steps, and level of independence to meet the needs of their class.
| Grade level | Suitable projects | Teaching approach |
|---|---|---|
| Kindergarten–Grade 1 | Floating and sinking, simple towers, seed observation | Use concrete objects, short instructions, pictures, and guided questions. |
| Grades 2–3 | Paper airplanes, weather observations, sorting machines, marble runs | Encourage predictions, simple measurements, and recorded observations. |
| Grades 4–5 | Paper bridges, circuits, water-filter models, balloon cars, garden design | Introduce fair testing, tables, graphs, controlled variables, and design revisions. |
These categories are flexible. A teacher can simplify a more advanced project or add extra constraints to increase the challenge for students who are ready.
How to Assess Student Learning During STEM Activities
The final product is only one part of a STEM project. Students can also demonstrate learning through their plans, predictions, measurements, explanations, and reflections.
Observe the design process
Look for whether students can identify the problem, suggest possible solutions, use materials thoughtfully, test ideas, and make changes based on evidence.
Review student records
Students can record their predictions, measurements, observations, and conclusions in a notebook or worksheet. These records help teachers see how students’ thinking develops throughout the activity.
Use a simple project rubric
Teachers can assess the following areas:
- Understanding: Can the student explain the problem or question?
- Planning: Did the student develop a reasonable plan?
- Investigation: Did the student make relevant observations or measurements?
- Problem-solving: Did the student use evidence to improve the design?
- Communication: Can the student explain the process and results?
- Reflection: Can the student identify what worked and what could change?
A simple scale such as “Beginning,” “Developing,” “Proficient,” and “Advanced” can help describe progress.
Assessment should be appropriate to the learning objective. For example, a plant-growth investigation may emphasize careful observation, while a paper bridge challenge may place greater emphasis on engineering design and testing.
Common Mistakes to Avoid in Elementary STEM Projects
Focusing only on the final product
A beautiful model does not necessarily show that a student understands the concepts behind it. Assess the thinking, testing, and explanations as well as the final result.
Giving students every step without allowing decisions
Detailed instructions are useful for safety and for introducing unfamiliar tools. However, students also need opportunities to make meaningful choices about designs, predictions, and improvements.
Making the challenge too complicated
Too many rules or unfamiliar materials can distract students from the main learning objective. Begin with a manageable challenge and add complexity gradually.
Treating mistakes as failure
An unsuccessful design provides information. Help students identify what happened and consider how they could change their approach.
Ignoring classroom safety
Teachers should check materials, supervise tools, and provide clear safety instructions before beginning. Avoid hazardous chemicals, unsafe electrical equipment, sharp components, and activities involving ingestion of experimental materials.
Forgetting to connect the activity to academic learning
A project should include opportunities to discuss the science, mathematics, engineering principles, or technology concepts involved. Without this reflection, students may enjoy the activity without fully understanding what it demonstrates.
Frequently Asked Questions
1. What are the best hands-on STEM projects for elementary students?
Good options include paper bridge construction, paper airplane investigations, seed-growing experiments, balloon-powered cars, simple circuits, floating-and-sinking tests, and paper tower challenges. The best project depends on students’ ages, available materials, safety requirements, and learning objectives.
2. How can teachers organize STEM projects on a limited budget?
Teachers can use everyday materials such as paper, cardboard, tape, reusable containers, rulers, and clean packaging. Students can also work in small groups and share materials. The learning value comes from asking questions, testing ideas, and improving solutions rather than using expensive equipment.
3. What skills do students develop through STEM projects?
Students can practise critical thinking, problem-solving, measurement, observation, creativity, collaboration, communication, and evidence-based reasoning. The specific skills depend on the project and how the teacher structures the activity.
4. How long should an elementary STEM project take?
A simple activity may take 20–30 minutes, while a construction challenge may require 45–60 minutes. Investigations involving plant growth or repeated weather observations may continue over several days or weeks. Teachers should allow enough time for students to test ideas and reflect on results.
5. How can STEM projects support mathematics learning?
Students can measure distances, compare quantities, count materials, record data, calculate averages, identify patterns, and create graphs. Connecting mathematics to a practical challenge helps students see how numerical concepts can be used to answer real questions.
6. Can STEM projects be completed without technology?
Yes. Many STEM activities require only simple materials and careful observation. Students can design structures, investigate plant growth, compare objects, measure distances, and solve engineering challenges without computers or electronic devices.
7. How can teachers include students with different learning needs?
Teachers can provide visual instructions, demonstrate individual steps, offer different ways to record observations, assign flexible group roles, and adjust the complexity of the challenge. Students should have meaningful opportunities to contribute, even when they need additional support.
8. How can parents support STEM learning at home?
Parents can encourage children to cook with appropriate supervision, observe plants, build with blocks, measure objects, explore simple puzzles, or investigate everyday questions. Asking children to explain what they noticed and what they would try next can make ordinary activities valuable learning experiences.
Conclusion
Hands-on STEM projects for elementary students help transform curiosity into active learning. Through experiments, building challenges, investigations, and design tasks, children can explore scientific ideas, apply mathematics, develop engineering skills, and learn to solve problems using evidence.
The most effective projects do not depend on expensive equipment or perfect results. They provide clear objectives, appropriate challenges, safe materials, opportunities for collaboration, and time to test and improve ideas.
By incorporating practical STEM activities into regular classroom instruction, teachers can help students become more curious, confident, creative, and thoughtful learners. These early experiences can also help children recognize that science, technology, engineering, and mathematics are connected parts of the world they explore every day.
Final Tips for Teachers
Before launching a project, prepare the materials, explain the safety rules, identify the learning objective, and decide how students will record their results. During the activity, encourage students to ask questions, test ideas, and learn from unexpected outcomes.
Afterward, give students time to explain what happened, compare their predictions with the evidence, and identify one improvement they would make. These simple habits help turn a fun classroom project into a meaningful STEM learning experience.
